Bellow, I have an Enterprise CA(Windows Server 2008 R2 EE). I’m not using CNG certificates on the CA.
Forefront TMG 2010 RTM SE is installed on Windows Server 2008 R2. TMG is a domain member.
I’ve used a lab in VMware ESXi 4.0 to create this blog entry.
I will use a custom Subordinate Certification Authority certificate template, but you don’t need this(actually to use such a template you may need the EE version of Windows Server on the CA machine), unless you want to customize in a form or another the Subordinate Certification Authority certificate template options. Scroll bellow, where the default Subordinate Certification Authority certificate template is used if you don’t want to use the custom template.
On the CA machine, click Start, head over to Administrative Tools and click Certification Authority.
On the opened CA mmc, expand the CA name node, right-click the Certificate Template and click Manage:

Within the Certificate Templates Console locate the Subordinate Certification Authority certificate template, right-click it and click Duplicate Template:

Leave it to Windows Server 2003 Enterprise:

Give a name to this template:

Head over to the Extensions tab, select Application Policies(this corresponds to the EKU field on the certificate to be issued), click the Edit… button, and add there Code Signing, Private Key Archival, Server Authentication(basically I’ve mirrored the EKU from the HTTPS Inspection certificate generated from TMG’s GUI):


On the Extensions tab, select Basic Constraints, click the Edit… button, and check the Do not allow subject to issue certificates to other CAs checkbox, this is a path length restriction, an extra security check(basically I’ve mirrored the Basic Constraints from the HTTPS Inspection certificate generated from TMG’s GUI, except the Basic Constraints there wasn’t marked as a critical extension):


Still on the Extensions tab, select Key Usage, click the Edit… button, and check the Signature is proof of origin (nonrepudiation) checkbox(basically I’ve mirrored the Key Usage from the HTTPS Inspection certificate generated from TMG’s GUI, except the Key Usage there wasn’t marked as a critical extension):


Now to make things a little easier, I’m going to do a (temporary) thing. Head over to the Security tab, and add a computer there which will be allowed to enroll such a certificate using the mmc, in my case is the CA itself:

Click Apply and OK to create this template:

Close the Certificate Templates window.
On the opened CA mmc, expand the CA name node, right-click the Certificate Template and click New -> Certificate Template to Issue, select the template we’ve just created, and click OK. Now you should be able to issue certificates using this template.


On the domain computer from which you will request the certificate(bellow is the CA itself), click Start, run, type mmc and hit enter.
On the opened console window, click the File menu, select the Add/Remove Snap-in, add the Certificates snap-in, Computer account and Local Computer and click Finish.
Expand the Certificates(Local Computer) node, expand Personal, right-click Certificates and point to All Tasks and click Request New Certificate:

The Certificate Enrollment wizard appears, click Next a couple of times till you reach the window from where you can select the needed template, in our case the newly created template, which is available for request from the mmc, select it and click the blue More information is required to enroll for this certificate. Click here to configure settings link, as we need to supply info like the CN.
Bellow I’ve added on the Subject tab, Subject name area from the Type drop-down list: a Common Name(CN), an Organization(O), an Organizational Unit(OU) and a Country(C).
Make sure the Make private key exportable checkbox is selected(as we need to be able to export the cert along with its private key). We use a 2048-bit RSA key.
On the General tab, you may like to type a Friendly name for this certificate to be able to quickly indentify it(I didn't add one).


Click Apply and OK to close the Certificate Properties window.
Hit the Enroll button.
And we will successfully obtain our subordinate CA certificate(click Finish to close this window):

Let’s take a quick look at the obtained certificate:

We will now export this certificate along with its corresponding private key(and later import it on TMG for the HTTPS Inspection), a password will be needed when exporting this certificate:


If you want, now you can remove the computer you’ve used to request the certificate from the Security tab of the created custom certificate template. Or simply remove this custom certificate template from the issuable certificate templates on the CA.
Time to import this certificate on TMG to be used for the Outbound HTTPS Inspection. In my case the Outbound HTTPS Inspection was already enabled, using a certificate generated from TMG’s GUI.
From TMG’s mmc, head to the Web Access Policy node, click the Configure HTTPS Inspection link from the Tasks panel, select the Import a certificate option on the General tab of the opened window, and click Import. Follow the wizard, select the needed certificate, type the password you’ve entered when you’ve exported the certificate. Hopefully you won’t receive any errors and the certificate will be successfully imported. Apply the changes on TMG.


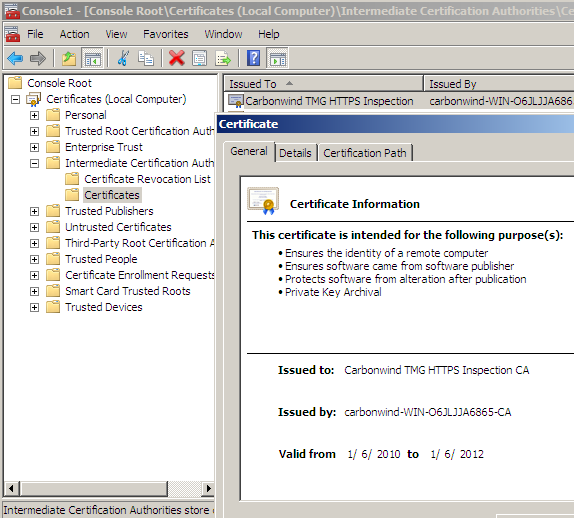
We can view from TMG’s mmc the certificate that will used for the Outbound HTTPS Inspection. As can be noted is the imported certificate.

If we now try to access a secure web site from a web proxy client(IE8 on Windows 7) behind TMG doing Outbound HTTPS Inspection, we should notice that this web server uses a certificate issued on-the-fly with our subordinate CA certificate:


Depending on some factors, some clients might issue certificates warnings, although they trust the root Enterprise CA. TMG might not send the intermediate CA certificate(the HTTPS Inspection certificate, which is a subordinate CA certificate) during the TLS handshake so the clients might be unable to follow the certificate chain. Make sure this certificate is present into the Local Computer/Intermediate Certification Authorities/Certificates store on the TMG machine, it should be there if you've deployed it through Active Directory from TMG's mmc(if not manually import it there(just the certificate(exported as .der/.cer file), not the .pfx file(which contains the private key)), and reboot the TMG machine).
Note: As we said above, you can use the default Subordinate Certification Authority template, I’ve applied the same (temporary) trick with this one to be able to request the certificate from the mmc:


Requesting a certificate using the Subordinate Certification Authority template:


The obtained certificate imported on TMG:

The certificate being used for the HTTPS Inspection:


As an extra note, my CA adds slightly modified from the original settings CRL Distribution Points and AIA extensions to the signed certificates, so the subordinate CA certificate has:


An extra little bit of fun: EV Certificates
As you may know, EV certificates are not supported with TMG’s 2010 Outbound HTTPS Inspection.
We are not interested in speaking about EV certificates right now. Will do so in a future(hopefully) next blog entry.
Note: What follows next is just for fun and testing, you should not do this on a real network. The root cause is not TMG 2010 and its Outbound HTTPS Inspection, rather IE8(used on Windows 7 bellow) and a Windows setting (which can be abused on the client side).
We can mess with TMG 2010 and its Outbound HTTPS Inspection because it does not remove something from the cloned certificate. It may work with Outbound HTTPS Inspection solutions from other vendors(I have not tested so I can't comment).
About that Windows setting, well, if MS allows end users to make decisions about EV roots and IE8, from here to abuse can be a short way.
First we need a little modification on our custom certificate template, on the Extensions tab of the custom certificate template, select Issuance Policies, click the Edit… button, and add the All issuance policies:

Issue a new certificate(with the modified template) to be used for TMG’s HTTPS Inspection:


First catch: the Certificate Policies from the original server certificate is still present on the cloned server certificate(although is no longer applicable), TMG does not remove it. Since the cloned certificates are end entity certificates, the information found under the Certificate Policies indicates the policy under which the certificate has been issued and the purposes for which the certificate may be used. Bellow Policy Identifier=2.16.840.1.113733.1.7.23.6 is VeriSign's EV OID. Whatever it says on the URL linked bellow in the original Certificate Policies no longer applies to the cloned certificate.

Second catch: I’m using a Windows 7 machine, and the Extended Validation “feature”, present if you view the properties of a trusted root CA certificate(right-click it and click Properties). Apparently it also works if you do that in the User Certificates store(bellow I did it within the Local Computer Certificates store). See this and this.
There you can add EV OIDs(obviously in the real world you should not use others OIDs for your certificates).
Let’s add here VeriSign's OID to our root CA(again note that you should not do this in the real world):

If we now try to access a secure web site using an EV certificate issued by VeriSign from the Windows 7 machine with IE8(web proxy client) behind TMG doing Outbound HTTPS Inspection, this site will go “green”:


Other web sites using EV certificates issued by VeriSign accessed from the Windows 7 machine with IE8 behind Forefront TMG 2010 RTM doing HTTPS Inspection, will also go “green”:

Note that there isn’t all about the OIDs. IE8 won’t make the bar green unless it can do a certificate revocation check or the SmartScreen filter is turned on. The on-the-fly issued certificates don’t have CRL Distribution Points or AIA(OCSP entry) extensions, but the subordinate CA certificate has a CRL Distribution Points, apparently this is enough for IE8.
An extra little bit of fun: Make Domain Validated Certificates Green
If we look at, say, domain validated certificates issued by GoDaddy we can note that under the Certificate Policies GoDaddy adds a certain OID. Bellow the Policy Identifier=2.16.840.1.114413.1.7.23.1, according to GoDaddy’s CPS(Certification Practice Statement) means a Medium Assurance Certificate.


If we add this OID on the Extended Validation “feature” of our trusted root CA certificate:

Then, web sites using domain validated certificates issued by GoDaddy “go green”:


OK, it’s a question mark there, but who can tell ?
Note: This is possible also without TMG on the path, we just need to locate the needed GoDaddy root CA and add the OID there(the real EV OID should be already present):


I’m not sure what Microsoft thought with this Extended Validation “feature” of trusted root CAs, but it is opened to abuse. Is little point to go with all the hassle on the CA side to issue EV certificates(pass an audit, etc.), and then blow it away on the client side. If the application vendor does not verify before accepting a root for EV in its application(say like here), hard coding it somehow(bind the correct EV OID with the root CA without being able to modify it with a few mouse clicks, of course if one has access to the source code can make the needed modifications and build a new version of the sotware, but that's more difficult to achieve), and instead allows the end user to make such decisions, the green bar easily looses its value.