|
15.06.2007
VMware Server Networking Options
VMware Server has a dedicated option(editor) called “Virtual Network Settings” from where we can play with the virtual networks and adapters:
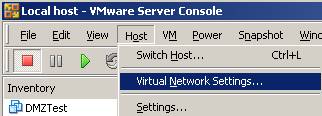
Figure1: VMware Server Virtual Network Settings
We can have as many as 9 host virtual adapters and 10 virtual networks as you can see below:
VMware virtual host adapters: VMnet1:VMnet9 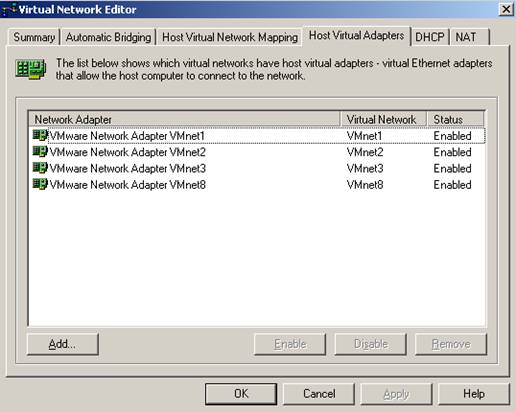
Figure2: VMware Server Virtual Network Editor(Host Virtual Adapters)
VMware virtual networks: VMnet0:VMnet9 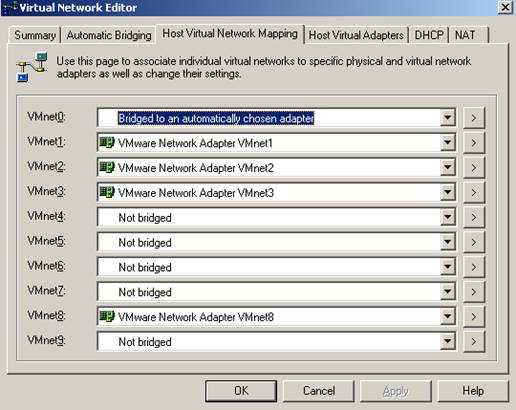
Figure3: VMware Server Virtual Network Editor(Host Virtual Network Mapping)
By default we have two virtual adapters enabled: VMnet1 and VMnet8: 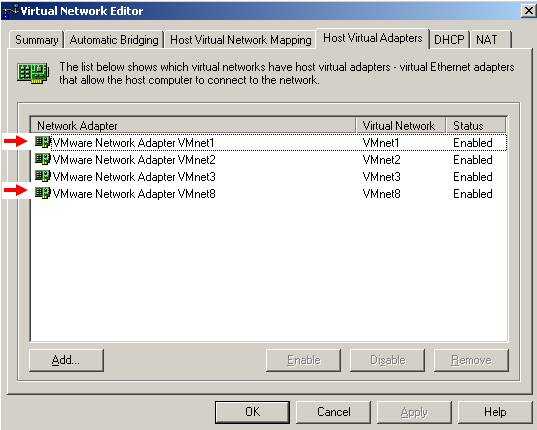
Figure4: VMware Server Virtual Network Editor: Default Virtual Adapters
Also by default there are three virtual networks configured : VMnet0, VMnet1 and VMnet8: 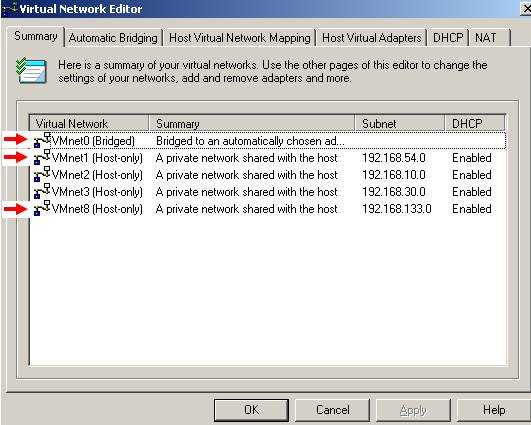
Figure5: VMware Server Virtual Network Editor: Default Virtual Networks
Please note that there is an option to automatically choose a real(physical) network adapter(the first one available) and bridge it to VMnet0. But we can manually select what physical adapter to bridge. VMnet0 network is special, meaning that we cannot bind a virtual network adapter to it. We can only bridge physical adapters to it. This bridge operation means that the VMnet0 network will actually “be a part” from our real network to which the bridged physical adapter belongs. So we can’t define any subnet ranges on it. Also if we have multiple physical adapters if we bridge one of these adapters to any VmnetX network automatically this adapter will be excluded from the bridge menu of VMnet0 network.
The “Automatically choose an available physical adapter to bridge to VMnet0” option: 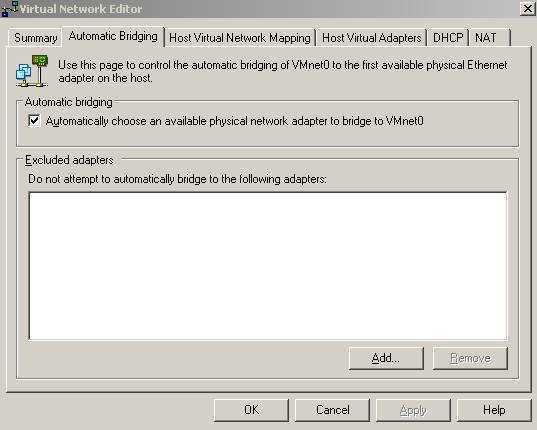
Figure6: VMware Server Virtual Network Editor: Automatic Bridging
Bellow the specified excluded network adapter was bridge to VMnet9 and thus it cannot be bridge to VMnet0: 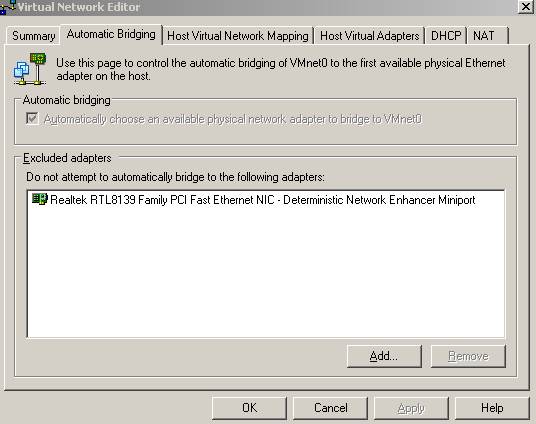
Figure7: VMware Server Virtual Network Editor: Excluded Adapters
As we start and add virtual adapters they are automatically added to a virtual network: 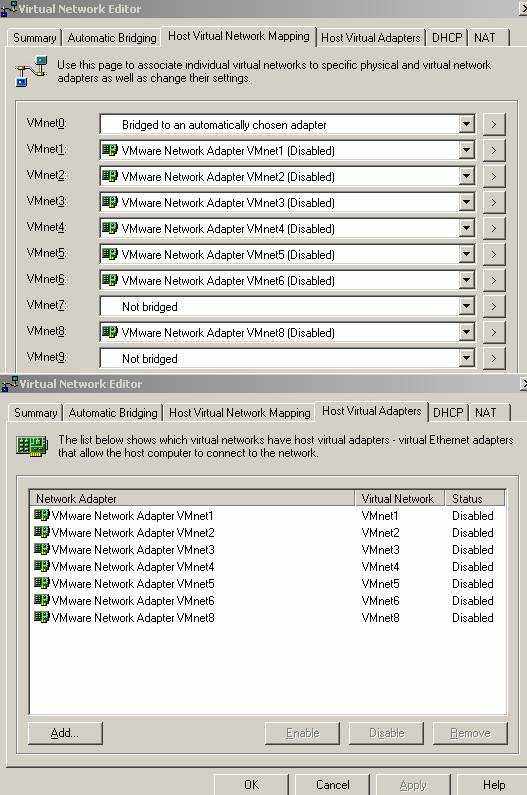
Figure8: VMware Server Virtual Network Editor: Added Virtual Adapter and Virtual Networks
And the VMware Network Adapter VmnetX will show up on our real host in its Network Connection panel:

Figure9: VMware NICs Note: If you don’t disable these network adapters on your PC, your computer will be directly connected to the virtual networks(for example leaving connected VMware Network Adapter VMnet2 means that you can direcly access the virtual hosts from VMnet2(like 192.168.10.0/24)).
If we add a VM and then we take a look at its network options for its Ethernet
adapter we will notice that we have four options of network connections: Bridge, NAT, Host-Only and Custom.

Figure10: VMware VM Network Connection
The VMnet1 adapter and network are for the “Host-Only” network connection option and the VMnet8 adapter and network are for the ”NAT” network connection option. These adapters are selected by default by VMware to accomplish these tasks. So if you select the “Host-only” option, the VM will use automatically the VMnet1 network and adapter. ”NAT” goes with VMnet8 adapter and network. They do have some IP address ranges and DHCP Scopes enabled on them by default. To access these settings click on “>” in the “Host Virtual Network Mapping” tab: 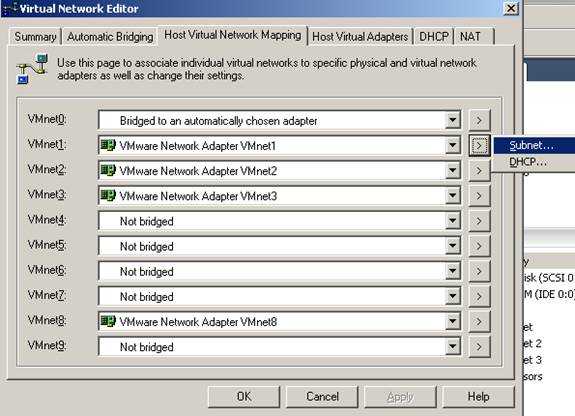
Figure11: VMware Virtual Network Editor: Choosing Subnet
The subnet options: 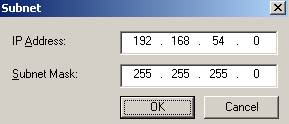
Figure12: VMware Virtual Network Editor: Subnet Options
The DHCP settings: 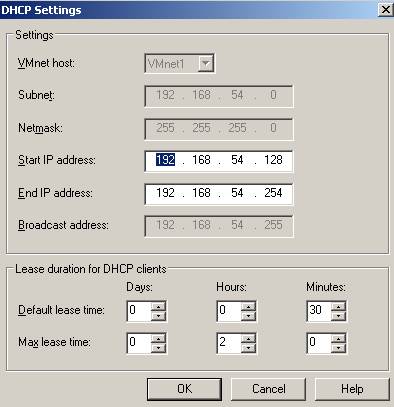
Figure13: VMware Virtual Network Editor: DHCP Options
Taking our time and digging through the Help file provided by VMware we can find plenty of information about virtual networks and virtual adapters.
Let’s analyze them one by one.
Bridge
The VM configured with this setting uses an IP address from our physical network and will have full access to our network resources. This means it can access Internet, a DHCP server located on our LAN, files shared and much more. As said above if we have a DHCP server our VM can obtain its IP address and other network settings from that server. It’s like having a separate computer on our network because this VM is also fully accesible from any host on our real LAN. This setting can be used in many scenarios.
NAT
This option allows us to access some TCP/IP based resources on the host system (like our Internet connection) without requiring an IP address from our real LAN. Instead the VM will use an IP address which belongs to VMnet8 virtual network. The VM is not accesible from any hosts located on the real LAN(obvioulsly except from our host), but VMware provides us some tools to make some services running on this VM available to the rest(see bellow).
This is VMnet8 adapter enabled on our real host: 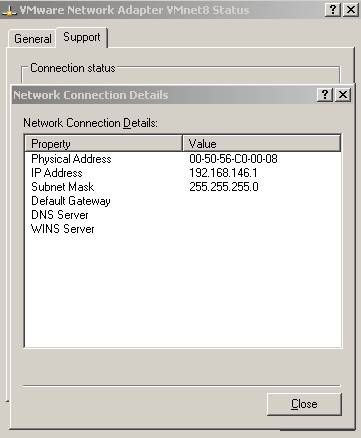
Figure14: VMware VMnet8 on Real PC
On the VM the IP settings will look like bellow(they were assigned by the DHCP service from VMware Server): 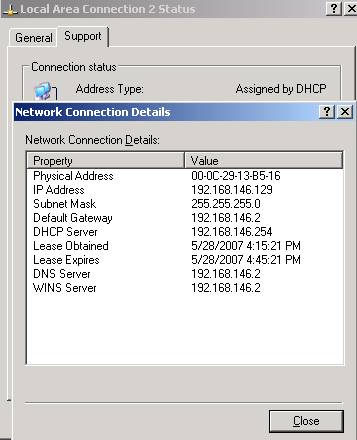
Figure15: VM Network Settings
Also the NAT setting has some options. If we click the ”Edit” from the “NAT” tab on “Virtual Network Editor”: 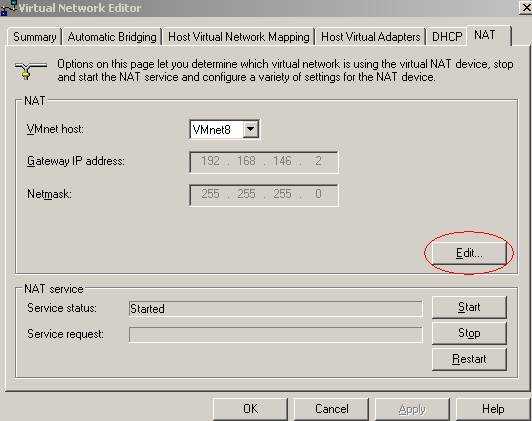
Figure16: VMware Virtual Server Virtual Network Editor: NAT(Edit)
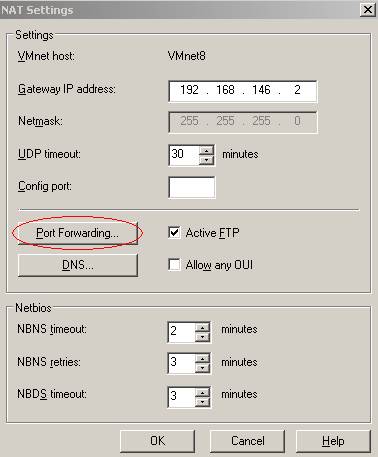
Figure17: VMware Virtual Server Virtual Network Editor: NAT(Edit/Port Forwarding)
We will get the above window. Note the “Port Forwarding” button. To explain it let’s consider the following scenario: a real host with the IP address of 192.168.22.3 is holding our VM. If we use this button and add a port mapping we can “publish” for example a web server located on the VM which will be accessible from all hosts on our real LAN. With the bellow settings: on the real host the TCP port is 80 and the web server configured on the VM is listening on port 80(TCP) also. So any host from our real LAN can contact this web server by http://192.168.22.3:80 or we can use a DNS server to give it a name. 
Figure18: VMware Virtual Server Virtual Network Editor: NAT(Edit/Port Forwarding Options)
Host-Only
Enables us to have a VM which is connected to our real host but invisible for other devices on our real LAN.For example, I have a VM with Windows XP SP2 installed on it configured with this network setting. My VMnet1 network belongs to 192.168.80.0/24 and the VMnet1 adapter is enabled on my real host. It has an IP address of 192.168.80.1. My virtual XP can use the DHCP server from VMware Server and obtain automatically an IP address belonging to this subnet. Bellow are the network setting from both machines, real and virtual: 
Figure19: VMware VMnet1 NIC on Real PC

Figure20: VM Network Settings
I can ping and access network shares from 192.168.80.1 to 192.168.80.128 and vice-versa. 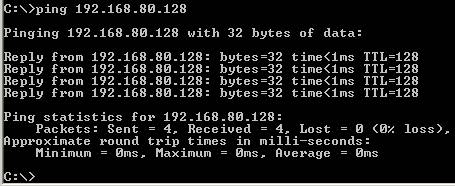
Figure21: Ping 192.168.80.1 to 192.168.80.128
As VMware says, it is a private virtual network shared between the host and any VM configured with this option. Also all VM using this settings are located on the same virtual network, meaning that they can “see” each other.
Custom
Using this setting we can setup complex network designs. For this option we have left seven virtual networks: VMnet2, VMnet3, VMnet4, VMnet5, VMnet6, VMnet7 and VMnet9. Note that this networks are also host-only networks and the VMs which belongs to them are accessible from our host if the corresponding virtual adapter is enabled on our host.
Misc Options
We can disable DHCP and NAT from VMware if we don’t need them. 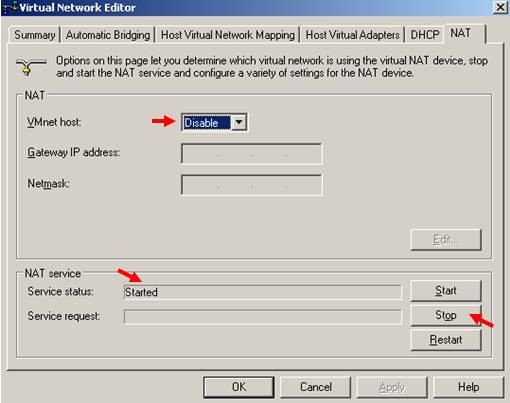
Figure22: Virtual Network Editor Stop/Disable NAT
Stop DHCP: 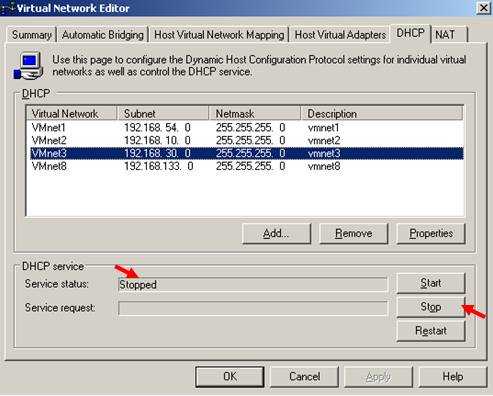
Figure23: Virtual Network Editor Stop DHCP
Go to the Services(on our real host)and disabled the Vmware DHCP and NAT services. Below I have also configured the two required services: VMware Authorization Service and VMware Registration Service to be manually started in order to optimize my PC performance. I will start them manually when I need to use VMware Server.

Figure24: Services on Real PC If you are curios and take a look at the “Local users and Groups” on your PC you will see that VMware has created a new user and a new group listed below. You should not touch these two. 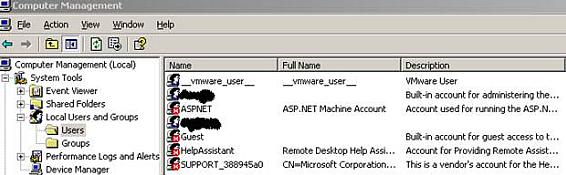
Figure25: Local Users on Real PC
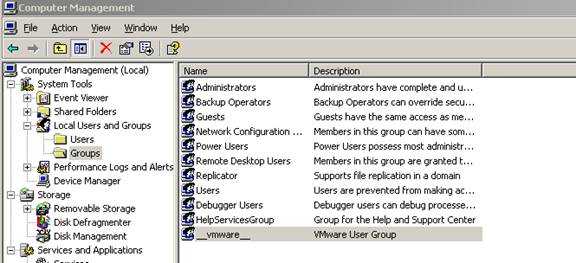
Figure26: Local Groups on Real PC
The disscusion about routing from VPC Networking Options applies here too so I won’t repeat it.
|